Notes on operation
From the
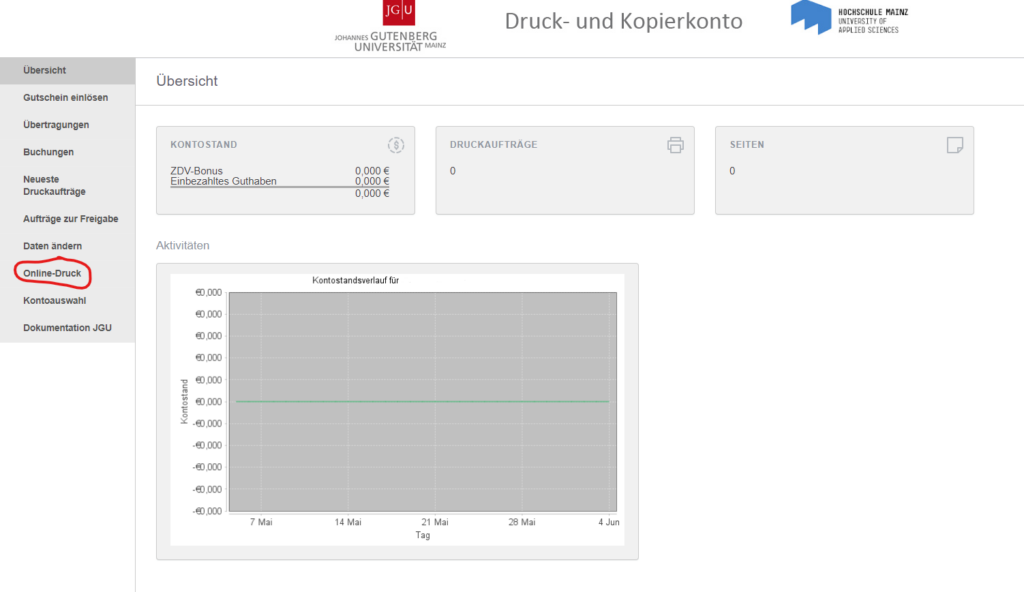
https://drucken.zdv.net page, after logging in, you can view your print and copy account and perform a number of other actions. The current account balance is displayed on the home page. Self-deposited credit and the ZDV bonus (for JGU students only) are shown separately.
Here you can also see a summary of all orders processed so far and the pages issued. A graph allows you to see directly when the last changes to the account balance occurred.
In addition to displaying the account balance, you can perform other actions on the aforementioned page using the menu items on the left:
Online printing
“Online printing” is a service that allows users who are temporarily connected to the network via WLAN (e.g. users of mobile devices) to print without having to install a printer driver. This is how it works:
- Log in at https://drucken.zdv.net/ with your JGU account.
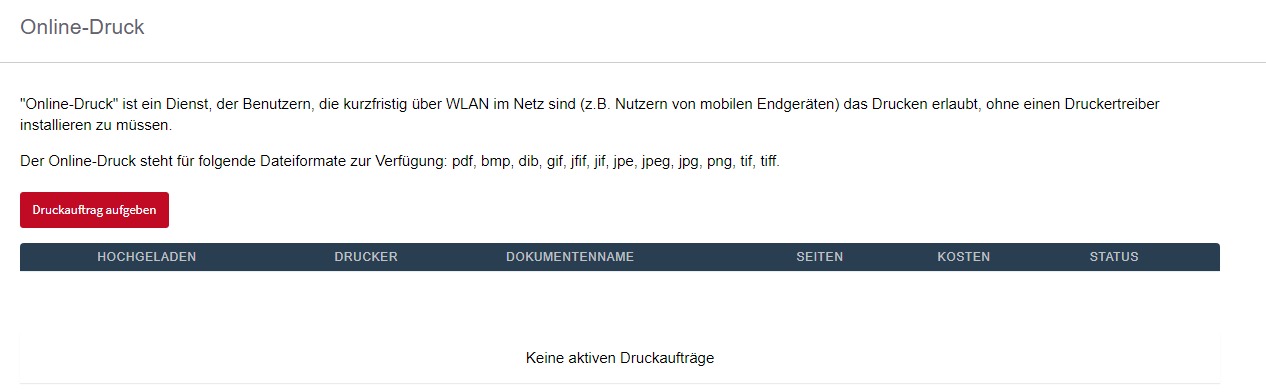
- Select the “Online printing” tile:

- You will now see your active print jobs and can send files to the printers under the red “Submit print job” tile. Online printing is available for the following file formats: pdf, bmp, dib, gif, jfif, jif, jpe, jpeg, jpg, png, tif, tiff..:
- Next, select whether you want to print your file in color or black and white or, if you are printing several pages, you can also print them on both sides (duplex printing).
- Set how many copies you want of your file.
- Upload the file and click Upload and Finish.
- Now you can log in to any printer with your JGU user name and your PIN, which you created for your print account at a service terminal, and print your uploaded files.
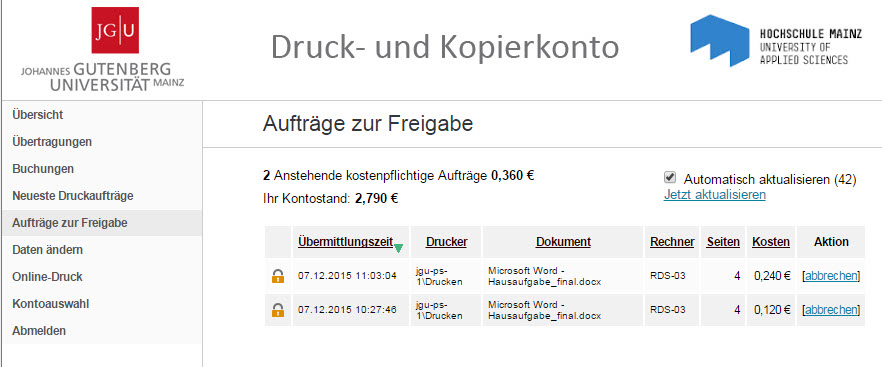
Check printing costs before printing (= orders for approval)
The Jobs for approval menu item allows you to check your print jobs from the workstation, control the costs, and delete (cancel) jobs if necessary.
Cost control is especially useful if color pages are included in the document. You can specify whether these are printed as color pages in the printer properties before printing - if you do not set anything else, black and white is printed.
In the picture above, a document with 4 pages in total, one of which contains colored text (the rest is pure black), was sent to the printer twice. Once (10:27 a.m.) the selection black/white was made in the printer properties (then all pages are printed black, also the color page), the second time (11:03 a.m.) color was selected in the printer properties - in this case the printer recognizes colored pages automatically and prints them accordingly.
In the list of jobs for approval, this distinction is shown by the different price:
The lower document is completely black and white: €0.12 = 4 pages at 3 cents each.
The upper document contains one color page:
0.240 € - 0.15 € (1 color page á 15 cents) = 0.09 cents
0.09 cents = 3 pages of 3 cents each.
Under unfavorable circumstances it can happen that the color recognition does not work 100% - black appearing pages could (e.g., if they contain gray scales) be falsely evaluated as colored. Such a problem can be detected by checking before printing.
Note: The calculation for the cost control before printing is generated by the software. After printing, the number of pages actually printed is also requested from the printer. In case of differences between the pre-calculated price and the actual one (reported back by the printer), the lower price is calculated. So you always pay only for the actually printed pages.
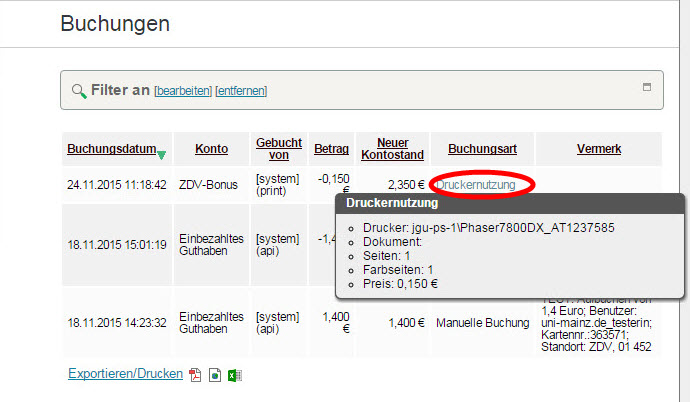
Control bookings
Bookings
All postings are displayed here - both credit postings and printing or copying processes. Since the list can become very confusing over time, there are sorting and filtering options. Attention: Not all booking types specified as filters are active in our installation!
To activate a filter:
Click on edit,
Set or select the desired filter
Right click on Apply filter
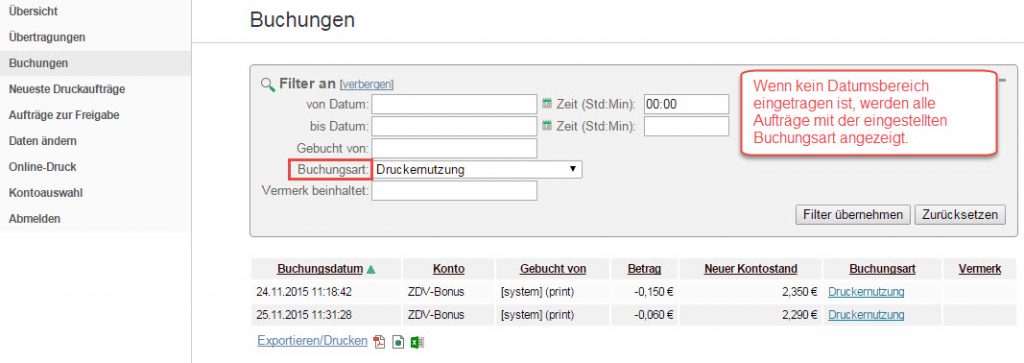
Useful are especially Printer Usage (shows all actually issued orders) and Manual Booking (shows all deposit transactions via Studicard).
The displayed bookings can be exported as PDF, HTML print view or csv file (for further processing e.g. with Excel) by clicking on the icons at the bottom of the page (next to the Export/Print link).
Details about the individual bookings (printer, page number, etc.) can be displayed by clicking on the respective entry in the column Booking type
Transferring credit to someone for printing/copying (= transfers)
Transfers (= Transfers)
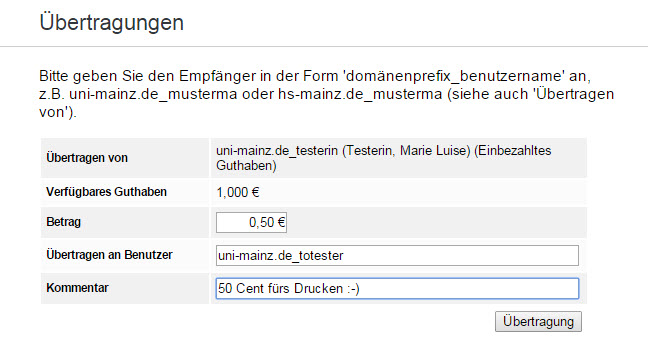
In the booking system there is a possibility to transfer credit to another user from your own (self-deposited credit). To do this, simply enter the amount to be transferred (this must not exceed the credit available on your own account, of course) and the recipient's user name in the following form:
Domain prefix (hs-mainz.de or uni-mainz.de) Underscore Username.
Example:
uni-mainz.de_totester for the recipient Tobias Tester with JGU account totester at JGU resp.
hs-mainz.de_lisatest for recipient Lisa Tester with JGU account lisatest at Mainz University of Applied Sciences.
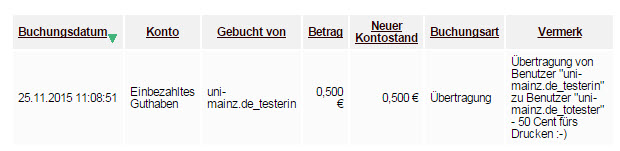
Under Comment you can add a comment for the recipient, which will be displayed later under the booking view in the column Note. Click on Transfer to make the booking.
At the recipient's end, this operation is then displayed under the bookings as follows:
Error message: User not found
You may receive a message that the recipient was not found when attempting a transfer:

If you are sure that the user name (and domain prefix!) are correct, the recipient may never have logged in to a printer terminal or the account query page. Ask him or her to log in once at https://drucken.zdv.net - or at a service terminal. This will create the JGU account for printing/copying - after which the transfer will also work.
4. cash in a voucher
If you have received a voucher for printing and copying, you can have it credited to the ZDV bonus under the menu item Redeem Voucher (it is not possible to credit vouchers to the deposited credit!). To redeem, enter the complete number of the voucher and then click on the Redeem Voucher button.
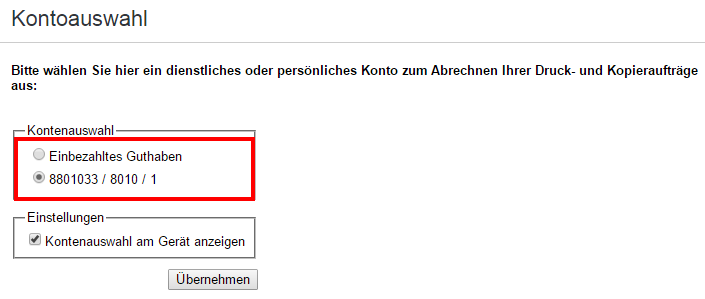
5. for employees: check and change debit object/cost center (= select account)
The menu item Account selection opens a new tab in the browser.
Here you can specify as an employee from which account your prints/copies should be debited. Normally, you only select the cost center/settlement object assigned to you once here and save this assignment by clicking Apply.
Employees who are assigned multiple cost centers/settlement objects can use this page to switch between accounts. Please note:
Unfortunately, it is not possible to change the account for a print job after it has been submitted! If you accidentally activated the wrong account when sending the job, you can of course delete your job, change the account and then send the job again. With the setting Show account selection on device you have the possibility to select the account directly on the device for copying (but not for printing!).
Deposited credit refers to your personal account to which you can deposit credit with the Studicard.
Note: The use of printing and copying services is permitted exclusively for official purposes or in the context of study/research and teaching.