
To be able to use ZDV services outside the university network, set up VPN access to the university network.
💡The use of an already established VPN access to the university network is explained on the page "Using VPN access to the university network under macOS".
💡Multiple VPNs can be created if VPN access to other networks is required simultaneously to access to the university network.
- Initiate the configuration of a new network connection
- Open the system setting
Network
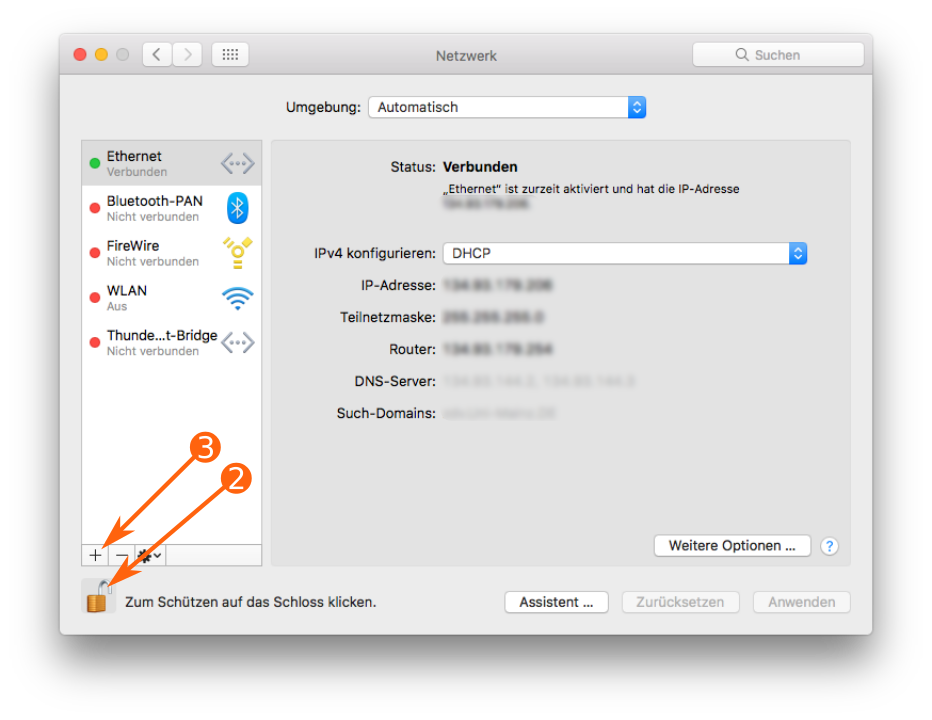
- If a closed padlock is displayed instead of an open one, request administration rights by clicking on the lock. For this you need the user name and password of a local administrator.
- A click on the button + starts the configuration of the new network connection.
- Open the system setting
- Configure the new network port as a VPN port

VPN configuration for the university network (first dialog) - set up
connectionfor VPN - choose IKEv2 as
VPN-Type - enter a meaningful name as
service name, for example VPN Uni Mainz - click on the button create to create the network connection for the VPN service
- set up
- Configure the new VPN connection for access to the university network
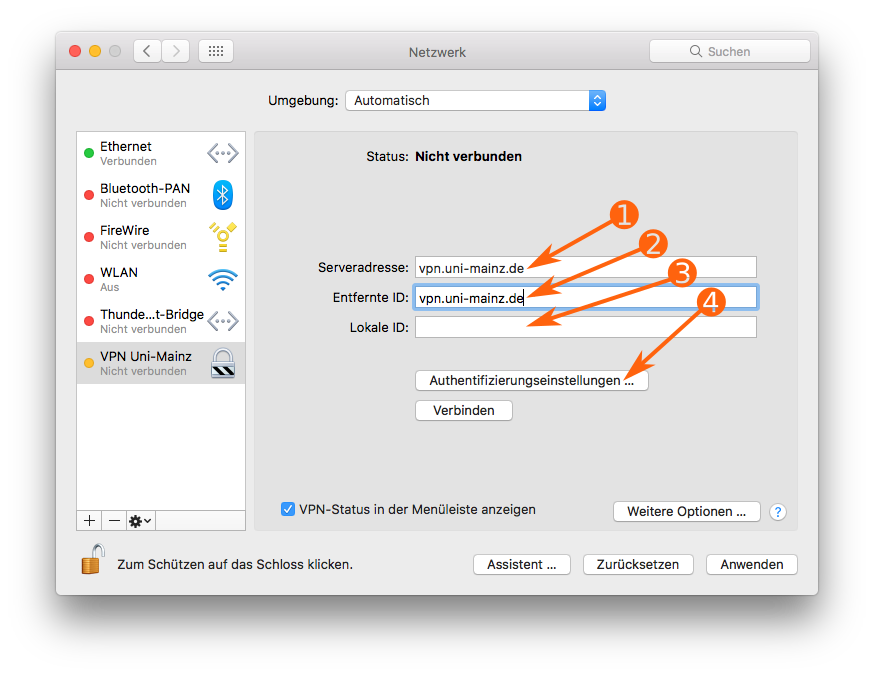
VPN-Configuration for the Uni-Net (second dialog) - as
server adress,enter vpn.uni-mainz.de - as
Remote IDalso enter vpn.uni-mainz.de - leave
lokal IDempty - click on the button Authentication settings ..., to enter your way of authentication
- as
- Enter the information needed for authentication

VPN configuration for the university network (Authentifizierungseinstellungen) -
- set login name in the pop-up menu at the top
- enter your unique login name as the
login name
⚠️ Your unique login name and your email may be different.
💡 You can also leave this input field empty. You will then be prompted to enter your login name each time you open the VPN connection. - In
Password, enter the password associated to your JGU account
💡 You can also leave this input field empty. You will then be prompted to enter your login name each time you open the VPN connection.
- Close the
Authentication Settingsdialog by clicking the button OK.
-
- Complete the setup of VPN access to the university network
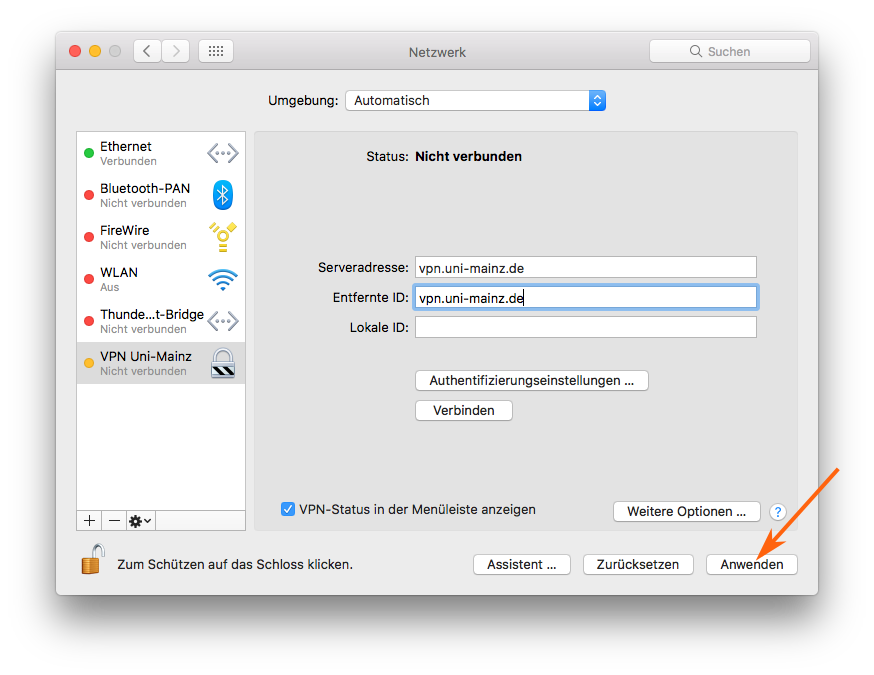
Activate the VPN settings you entered. Click the Apply button to complete the configuration of your VPN access to the university network and enable its use.


