
You will receive basic information on the topic of agentic coding and practical step-by-step instructions on how to use the AI-Chat@JGU platform, using the VS Code extension Cline as an example.
The aim is to enable you to integrate AI-supported workflows into the development of source code and scripts in a meaningful way.
What is Agentic Coding?
Agentic coding describes a paradigm shift in AI supported software development
Instead of simply having language models (LLMs) respond to individual commands in a chat environment, they are allowed to work as (more or less!) autonomous agents that understand overarching goals, break them down into sub-goals, interact with the environment (e.g., existing code base, command line, APIs), and iteratively improve their work based on feedback.
Unlike code completion tools that have been available for some time, such as Github Copilot, the focus is not limited to isolated code suggestions, but rather on holistic task processing – from planning and implementation to testing.
Such an agent can perform the following steps, for example:
- Analysis of a task
- Generation of a detailed implementation plan
- Automated processing of multiple files
- Execution of tests for validation, if necessary
- Adjustment of the code in case of failures
This process is made possible by the capabilities of modern LLMs, which have advanced reasoning abilities and tool use (tool use/function calling). The JGU AI platform supports this functionality via its API and models such as “Qwen3 235B VL (Thinking),” which are particularly powerful in STEM and coding applications.
Best Practices for Agent Coding
To ensure effective and reliable agentic coding, follow these best practices:
Clear goal definition
- Always start with a precise description of the task.
- Formulate goals as concretely as possible.
- Example: “Create a REST API route for user registration with email validation” instead of “Build login.”
Plan before action
- First, request an explicit plan from the agent before making any changes to the code.
- This allows for manual verification of the procedure and prevents unwanted or incorrect actions.
- Be sure to use a reasoning model for the planning phase.
Active correction
- Although the agent can work autonomously, active user involvement often leads to better results.
- Provide feedback when you have questions or when reviewing generated code, and redirect the agent if necessary.
Context management
- Ensure that the agent has access to relevant context.
- While modern tools enable LLMs to navigate even large code bases, you should not hold back on providing information about relevant files.
- Current references to APIs and similar items should also be provided directly or made available via a retrieval tool.
Regular refactoring
- When implementing code, LLMs tend to take the simplest route possible at first.
- If you let LLMs generate a lot of code quickly, the result is often poorly structured (spaghetti) code.
- That's why it's important to demand structure from the outset and to schedule regular refactoring.
Security and control
- Use tight version control (e.g., with git).
- Critically review all changes suggested by the agent, either immediately or before the next commit.
- Use “dry-run” functions when executing the code for the first time.
- To allow agents to work fully autonomously, use an isolated environment.
The human developer is always responsible for the final result!
Example: Visual Studio Code with the “Cline” extension
There are now a variety of tools available for agentic coding. You can find a good overview here: https://artificialanalysis.ai/insights/coding-agents-comparison. All tools that support “most public APIs” should work seamlessly with our API endpoints.
As an example, we present the Cline extension for the popular code editor Visual Studio Code, which is based on the “plan before action” paradigm and is particularly easy to configure.
The following shows how Cline can be optimally configured with the Qwen3 235B Thinking (for the planning phase) and Qwen3 235B VL (for the execution phase) models.
Requirements
- You need an API key from the [KI-Chat@JGU interface]: https://ki-chat.uni-mainz.de
- For more information on API key generation, see KI-Chat: API usage: https://www.en-zdv.uni-mainz.de/ai-chat-api-usage/
Step 1: Installing the Cline extension
- Open Visual Studio Code.
- Go to the Extensions view (“Extensions” in the sidebar).
- Search for “Cline” and install the extension.
- After installation, a new “Cline” tab will appear in the sidebar.
- Open Cline by clicking on the tab. The window that opens should look like this:
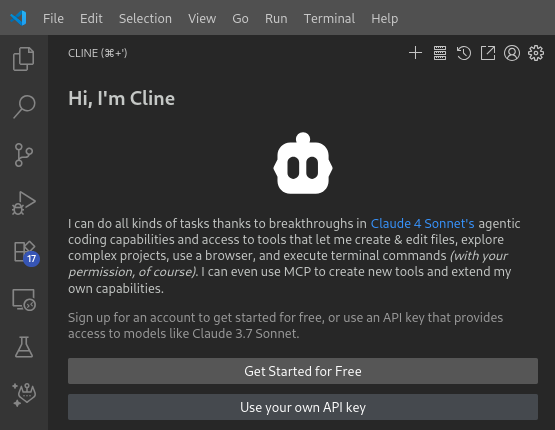

Step 2: Basic Configuration
1.Please select Use your own API key.
2.Please enter the following basic configuration:
-
- API provider: OpenAI Compatible
- Base URL: https://ki-chat.uni-mainz.de/api
- OpenAI Compatible API key: Your key from the KI-Chat@JGU frontend
- Model ID: Qwen3 235B VL
3.Leave everything else as it is for now and click on Let's go at the bottom.

Step 3: Configuring the Models
1.Open the settings by clicking on the gear icon in the top bar (see screenshot).
2.In the settings, first check the box at the bottom for Use different models for Plan and Act modes.
3.Open Model Configuration and enter the following values.
-
- Temperature: `0.6`
- Context Window Size: `73728`
- Max Output Tokens: `8192`
4.Uncheck Supports images / Supports browser use.
5.Switch to the Plan tab.
6.Enter the following values:
-
- Model ID**: `Qwen3 235B VL Thinking`
- Temperature: `0.7`
- Context Window Size: `81920`
- Max Output Tokens: `16384`
7.Uncheck the boxes for Supports images / Supports browser use.
8.Click Done at the top and reopen the settings.
9.Click on the Feature Settings tab on the side and activate Enable Auto Compact at the bottom.
10.Click Done again at the top.
Note: There is currently a bug in Cline whereby the corresponding values are not displayed correctly in the Settings when switching between Plan and Act. However, if you switch modes in a new task window and *then* go to Settings, the values should be displayed correctly.
Step 4: Try it out
To work on an existing project, always open it in VSCode as a folder first so that the context is clear.
- Click on the + symbol at the top to start a new “Task.”
- You can formulate your task description in the chat window. Below the input field, there are buttons for uploading files or integrating MCP servers, for example.
- At the bottom right, there are buttons for switching between Plan and Act. You should always start with Plan until the model suggests switching to Act.
- Above the chat window, there are settings options for performing certain actions without confirmation. The recommendation here is clearly not to run any action that changes anything without confirmation. If you want to deviate from this, you should use an isolated environment.
- Try out your first attempts with a simple task.
Good luck!

Further documentation can be found here: https://docs.cline.bot/getting-started