
Adding a Data Center Printer
If the printer with the name \\jgu-ps-1.zdv.net\Drucken is not listed under availabel printers you need to add it manually. The following procedure should work in all current windows versions. The only requirement is that your computer needs to be inside the universitys domain, connected to its WLAN or connected via VPN.
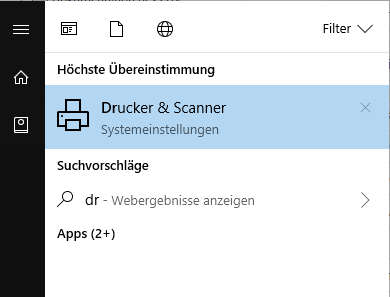
Click on the Windows button (the button with the flag/window in the bottom left corner on the keyboard.)

Write printer in the input field. In the following the procedure will be described for Windows:
You will see the option "Printer & Scanner" (System settings). Click on it.
Afterwards an new window will open.

Click on the + symbol (adding Printer & Scanner)
Afterwards all availabale printers and scanners will be listed:
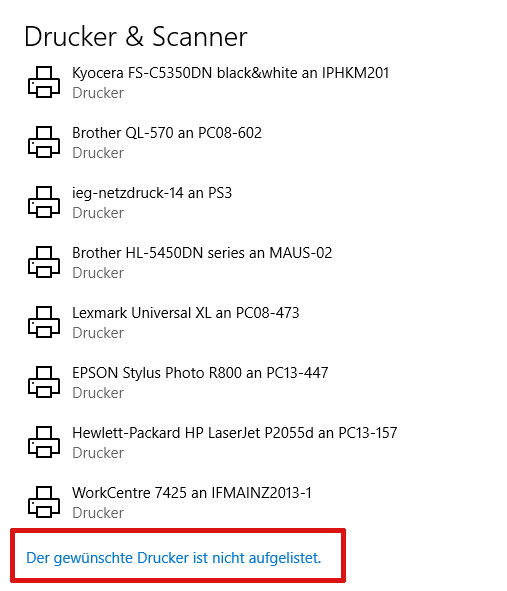
Click on (all the way down under the list of all scanners and printers) "The desired Printer is not listed". An additional window will open:
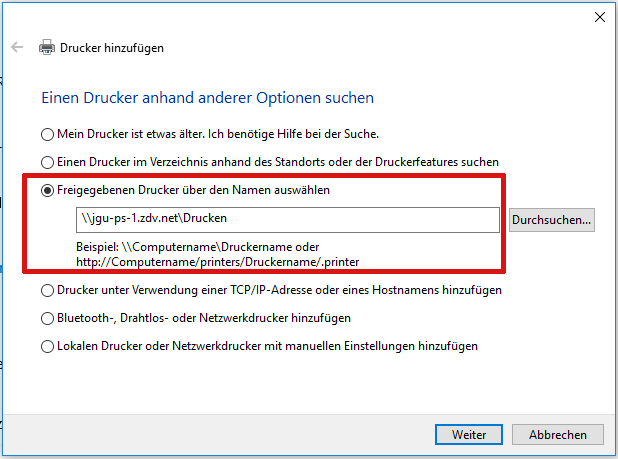
Set the selection point on choosing freed printer threw the name. In this field you will write:
\\jgu-ps-1.zdv.net\Drucken
Click on continue. The installation will take a second, then following notification will appear: Printer jgu-ps-1.zdv-net was added successfully.
Click on continue. Now you will have the possibility to decide if the added printer should be set as the default printer. Default printer means preselection - the printer which will be chosen at first when you will give a print order.
Lastly click on complete. The printer is now installed.
Note: These instructions are firstly for computers within the domain or which can be found in the PC-Pools. Fundamentally you can also add the printer on your private computer (notebook connected via WLAN or computer via VPN).
Adding Printer on a private Computer
Open the Start menu and search for the Run program.
Start the program and enter the printer name \\jgu-ps-1.zdv.net\Print in the input line.
Confirm your entry. You will now be asked for the username and password of your JGU account.
Enter your username in the format uni-mainz\username.
If another local user is entered, click on more options and
enter the correct username as described above.