
Setting up Email in Thunderbird
When you first open Thunderbird, setting up an email address starts automatically.
- Enter name, email address and password and click Next.
- The settings on the university's email server will be searched.
Click on Edit manually. - MAIL SERVER:
Protocol: IMAP
Hostname: mail.uni-mainz.de
Port: 993
Connection security: SSL/TLS
Authentication method: password, normal
username: yourusername - OUTGOING MAIL SERVER:
Hostname: mail.uni-mainz.de
port: 587
SSL: STARTTLS
Authentication: password, normal
username: your username - your username: Only the username is sufficient, i.e. without the addition @uni-mainz.de!
- Click on Done afterwards.
⚠️ Caution: It may be necessary to test the settings first using the Retest command. If this is the case, the authentication of the source server will be changed.
The authentication must be set to password, normal. Otherwise, sending emails is not possible.
Exchange with Thunderbird
Connect Thunderbird with the Exchange service of JGU. This will give you access to your JGU calendar.
Set up functions
Use Thunderbird to access the Exchange calendar, edit your appointments and synchronize them with the Exchange calendar.
Install two add-ons in Thunderbird for this purpose:
- TbSync: This add-on synchronizes the data between Thunderbird and the Exchange server.
- Provider for Exchange ActiveSync: Extends "TbSync" with account management and synchronization with ActiveSync.
Installing add-ons in Thunderbird
1. click on the so-called Burger menu ≡ (button with the three horizontal lines) in the upper right corner. In the context menu that opens, select Add-ons and Themes.
2. click Extensions on the left side.
3. Search for the two add-ons using the search field in the upper right corner. Click + Add to Thunderbird for Tbsync and Provider for Exchange respectively.
Add JGU account
- After the add-ons are installed, you will see a TbSync: Idle in the lower right corner. Click on it:

- In TbSync account management, choose Account Actions→ Add New Account → Exchange ActiveSync.
- The Account Information window opens.
- Select at Server configuration: User specific configuration.
- Account name: A free text e.g. JGU
Username (email address): UNI-MAINZ/username
Password: Your password
Server Address: mail.uni-mainz.de - Click on Add account
- You will be redirected to a new window.
Check Activate account and synchronize - Sync Interval (minutes): Set a value for how often the data should be synchronized. If the value is set to 0, the synchronization must be done manually.
- Click Activate account & connect to server.
- In TbSync account management, tick the required items: Contacts, Calendar and Task
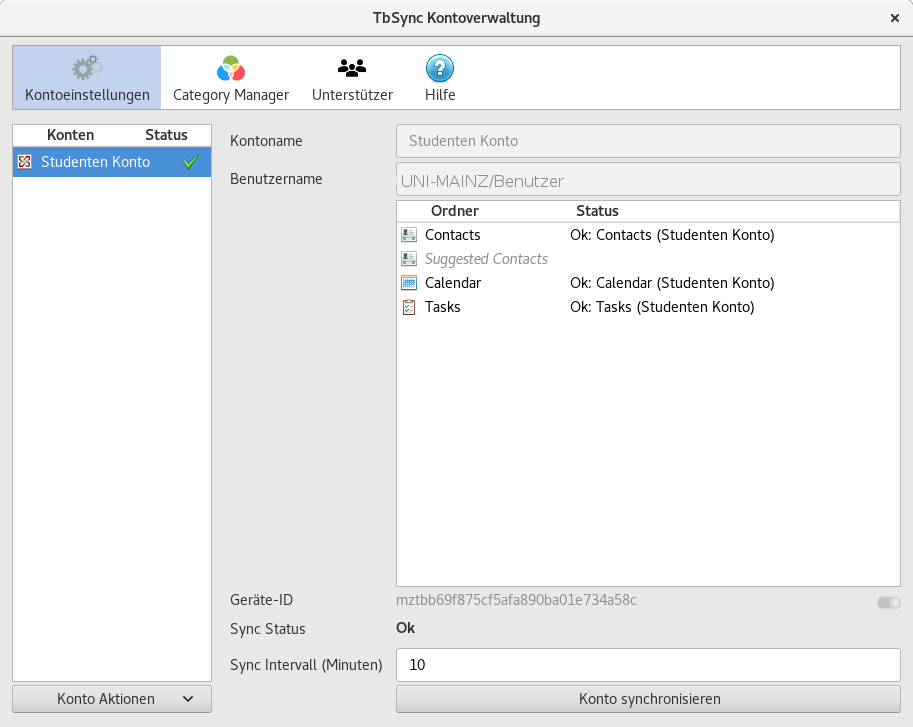
- ❗ Even if the status shows OK after setup, it takes a little time for the server to provide all the data. Leave Thunderbird running. After some time the data will be synchronized.
This is only necessary after the first setup. After that the synchronization takes place immediately.
